部署到github page
新建仓库 woshilinqin.github.io 其中前面是你 github 的用户名
到 vuepress 编译后的 dist 文件直接初始化 git 仓库
下面方式用的是 https 方式,需要验证帐号信息,除非你设置了免密。
git init
git add README.md
git commit -m "first commit"
git remote add origin git@github.com:woshilinqin/woshilinqin.github.io.git
git push -u origin master
还可以使用脚本进行编译构建推送
在
docs/.vuepress/config.js设置正确的base。如果你打算部署到
https://<USERNAME>.github.io/,就可以省略这一步,因为base默认为"/"。如果你打算部署到
https://<USERNAME>.github.io/<REPO>/(也就是说你的仓库地址是https://github.com/<USERNAME>/<REPO>),设置 base 为"/<REPO>/"。在你的项目中,创建一个有以下内容的
deploy.sh文件(对高亮行适当注释),然后运行它完成部署:
#!/usr/bin/env sh
# 终止一个错误
set -e
# 构建
npm run docs:build
# 进入生成的构建文件夹
cd docs/.vuepress/dist
# 如果你是要部署到自定义域名
# echo 'www.example.com' > CNAME

git init
git add -A
git commit -m 'deploy'

# 如果你想要部署到 https://<USERNAME>.github.io
# git push -f git@github.com:<USERNAME>/<USERNAME>.github.io.git master

# 如果你想要部署到 https://<USERNAME>.github.io/<REPO>
git push -f git@github.com:woshilinqin/document.git master:gh-pages

cd -
这里的 document 为仓库名称,并且 base 已经设置为
base: '/document',除此之外,git 也已经生成好了 ssh 密钥,并且关联 github 帐号添加了 ssh key。我这里分两个仓库,一个仓库记录博客源码,另一个仓库 document 部署编译后的静态页面。当然也可以使用同一个仓库不同分支来实现。
然后在 package.json 里面增加 "deploy" : "bash deploy.sh",命令行执行 npm run deploy 触发编译构建上传。
{
	"name" : "com",
	"version" : "1.0.0",
	"description" : "",
	"main" : "index.js",
	"scripts" : {
		"docs:dev" : "vuepress dev docs",
		"docs:build" : "vuepress build docs",
		"deploy" : "bash deploy.sh"

	},
	"author" : "",
	"license" : "ISC"
}
自动化构建
方案一:使用 Travis(已收费)
首先进入 travis-ci 官网,使用 github 帐号登录,将对应的项目启用 Travis CI :
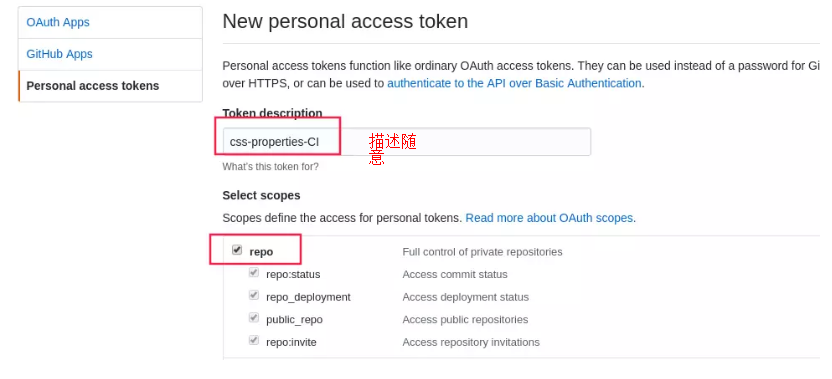
- 首先先在 github 仓库设置获取 personnal access token


- 将生成的 token 放入 Travis 环境变量中。

项目跟目录添加 .travis.yml
language: node_js
node_js:
- lts/*

# 缓存目录,加速编译
cache:
  directories:
  - node_modules

# 初始化环境
install: npm install -g vuepress
before_script: chmod a+x deploy.sh
script:
- bash ./deploy.sh
#deploy:
#  provider: pages
#  skip-cleanup: true
#  local_dir: docs/.vuepress/dist
#  github-token: "${access_token}"
#  keep-history: true
#  on:
#    branch: gh-pages
其中对应的 deploy.sh 脚本内容如下:
这里的 access_token 对应 travis 网站上设置的环境变量名称。git 推送地址使用 http 形式,使用 ssh 的形式会报错没有权限。
#!/usr/bin/env sh

# 终止一个错误
set -e

# 构建
npm run docs:build

# 进入生成的构建文件夹
cd docs/.vuepress/dist

# 如果你是要部署到自定义域名
# echo 'www.example.com' > CNAME

git init
git add -A
git commit -m 'deploy'

# 如果你想要部署到 https://<USERNAME>.github.io
# git push -f git@github.com:<USERNAME>/<USERNAME>.github.io.git master

# ssh推送,如果你想要部署到 https://<USERNAME>.github.io/<REPO>
# git push -f git@github.com:woshilinqin/document.git master:gh-pages

# http推送
# git push -f https://github.com/woshilinqin/document.git master:gh-pages

# http推送,travis-ci自动化,
git push -f https://${access_token}@github.com/woshilinqin/document.git master:gh-pages

cd -
如何跳过自动构建
如果 commit 不想让 Travis 构建,那么就在 commit message 里加上 [ci skip] 就行了。
git commit -m "[ci skip] commit message "
方案二:使用 Github-Action
- Create a
.github/workflowsdirectory in your repository on GitHub if this directory does not already exist. - In the
.github/workflowsdirectory, create a file namedgithub-actions-demo.yml. For more information, see "Creating new files." - Copy the following YAML contents into the
github-actions-demo.ymlfile:
name: 博客发布

on:
  push:
    branches:
      - master

jobs:
  build:
    runs-on: ubuntu-latest

    steps:
      - name: Checkout master
        uses: actions/checkout@v2
        with:
          ref: master

      - name: Setup node
        uses: actions/setup-node@v1
        with:
          node-version: "16.x"

      - run: npm install
      - run: npm run docs:build
      - run: echo 'linqin.site' > ./docs/.vuepress/dist/CNAME

      - name: Build project
        uses: peaceiris/actions-gh-pages@v3
        with:
          github_token: ${{secrets.access_token}}
          publish_dir: ./docs/.vuepress/dist
name 为 action 名称
on.push 表示 push 的时候出发,并指定分支
job 里面的 step 表示步骤
每个 steps 里面是一项项的动作,name 注释可有可无, uses 可以引用官方的轮子,run是表示执行的命令,注意执行目录都是 master
当前目录。
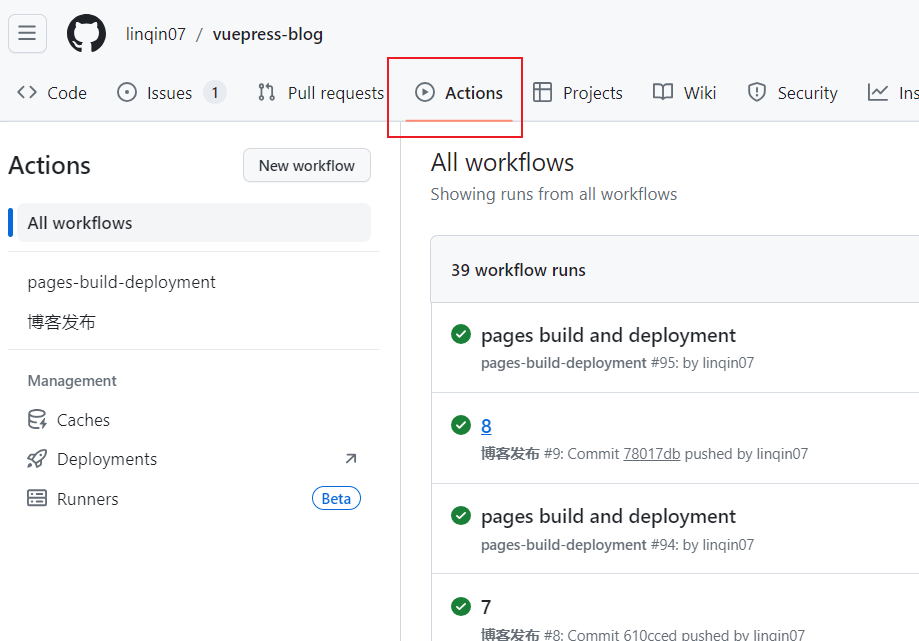
可以在 Actions 里面看到自己的工作流。

需要注意的是,不管是 run 里面的密钥,还是轮子使用到的密钥,都可以使用引用变量的方式替换,防止 public 暴露。
新建变量
新建个人token,个人设置 -> 开发者选项 Personal access tokens -> tokens (classic) ,创建后
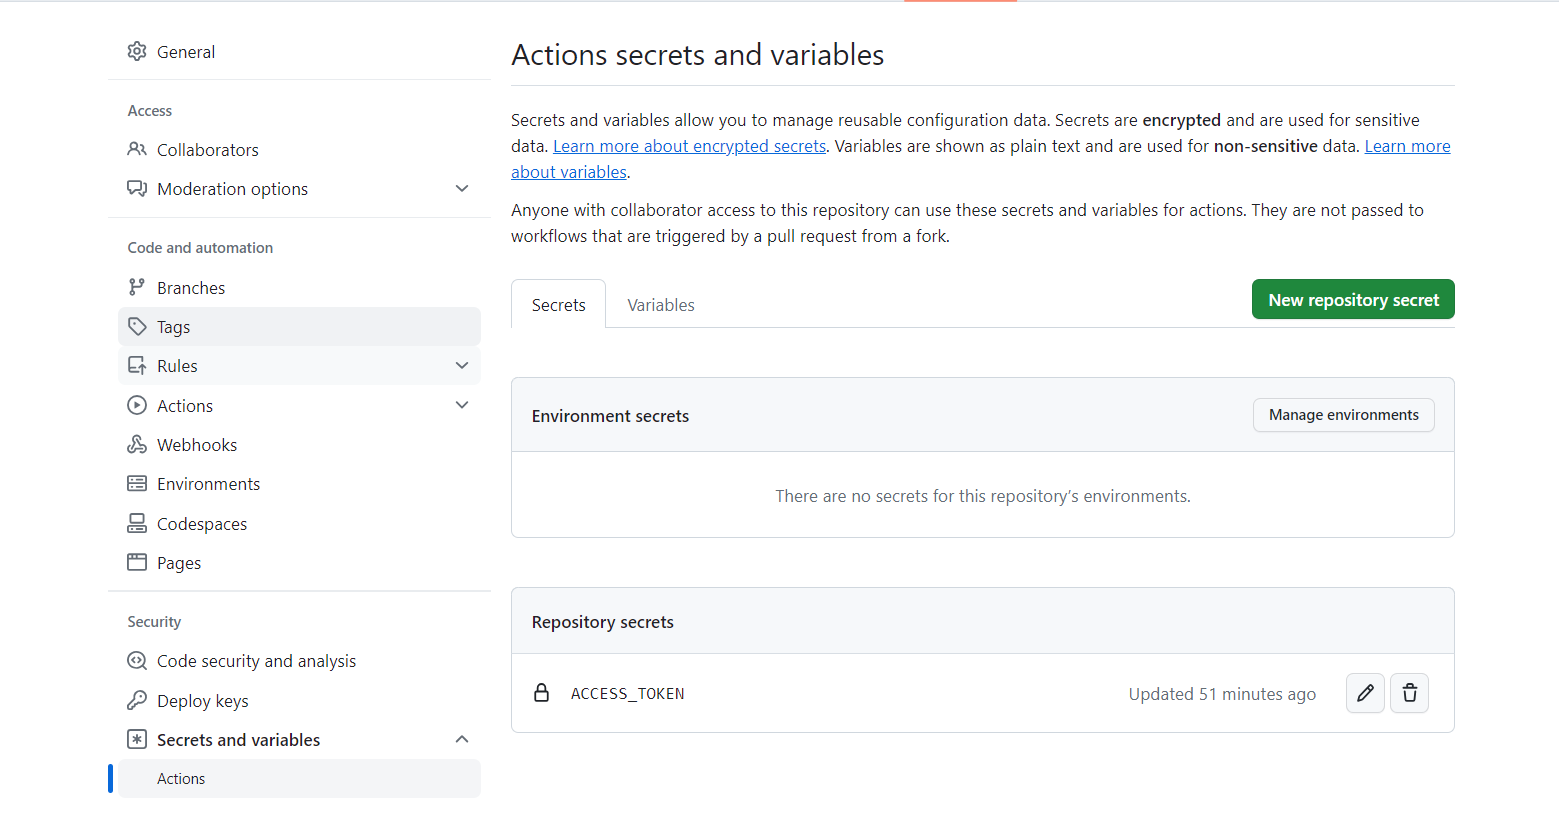
仓库设置,配置对应的变量名称,值就是个人token
引用方式,可以 run 直接引用,或者是轮子引用。
${{secrets.SECRET_KEY}}
发布到自定义域名
首先,先去阿里云买个域名,可以在控制台找到自己的域名,新增解析。新增解析记录。

发布脚本增加
# 如果是发布到自定义域名
echo 'www.linqin.site' > CNAME
注意:由于记录值为 xxx.github.io,所以文档的 base必须为 /,具体请见部署教程 > Github 页面
发布不能实时刷新,GitHub有时区延迟正常,过8小时再看即可。

